
Did you know that changing your home thermostat can not only save you money on your energy bills but also help reduce your carbon footprint? Yet, most homeowners shy away from this seemingly daunting task, relying on professionals to handle it for them. But fear not, as we take you through a step-by-step guide on how to easily change your home thermostat, without any professional help. From choosing the right thermostat to installation and programming, we’ve got you covered. So, grab your tool kit and let’s get started!
Tabe of Contents
- 1. Understanding Your Home Thermostat: A Guide to the Basics
- 2. Step-by-Step Instructions for Removing Your Old Thermostat
- 3. How to Choose the Right Replacement Thermostat for Your Home
- 4. Wiring Your New Thermostat: Tips and Common Mistakes to Avoid
- 5. Programming Your New Thermostat: Setting Temperatures and Schedules
- 6. Troubleshooting Your New Thermostat: Common Issues and How to Fix Them
- People Also Ask
- Conclusion
1. Understanding Your Home Thermostat: A Guide to the Basics
A thermostat is a vital part of any HVAC system. It’s the device that senses the temperature in your home and communicates with your heating, ventilation, and air conditioning system to maintain the desired temperature. Understanding how your thermostat works is crucial to making sure your HVAC system operates efficiently.
The Components of a Thermostat
A thermostat typically consists of a display screen, control buttons, and a temperature sensor. Some thermostats may also feature additional components like Wi-Fi connectivity, voice control, or advanced scheduling features.
Types of Thermostats
There are several types of thermostats available on the market, each with its own strengths and weaknesses. The most common types include:
- Manual thermostats: These are the simplest type of thermostats and require manual adjustments to set the temperature.
- Programmable thermostats: These thermostats can be set to turn on or off automatically based on a pre-programmed schedule. This can help save energy and money by reducing HVAC usage when no one is home.
- Smart thermostats: These thermostats use advanced sensors and algorithms to learn your preferences and adjust temperature settings automatically. They can also be controlled remotely using a smartphone app.
Thermostat Placement
The placement of a thermostat can impact its accuracy and effectiveness. It’s best to install the thermostat in a central location away from direct sunlight, drafts, and other sources of heat or cold. Avoid placing the thermostat near appliances like a television or computer that generate heat, as this can cause the thermostat to misread the room’s temperature.
By understanding the basic components and types of thermostats, you can make an informed decision about which thermostat is best for your home. Additionally, proper thermostat placement can help ensure that your HVAC system operates efficiently, keeping you and your family comfortable year-round.
2. Step-by-Step Instructions for Removing Your Old Thermostat
In this section, we will guide you through the process of removing your old thermostat. This step is essential to allow room for your new thermostat and ensure that the installation process goes smoothly.
Step 1: Turn off the power to your heating/cooling system
Before you start removing the thermostat, you need to turn off the power to your heating/cooling system. This is to prevent any accidents or damage to the system. To turn off the power, locate the circuit breaker that controls the HVAC system and turn it off. You can also remove the fuse that powers the system from the fuse box.
Step 2: Remove the thermostat cover
Next, you need to remove the thermostat cover to access the wiring. The cover may snap off, or you may need to unscrew it from the wall. If you are unsure, consult the manufacturer’s instructions for your specific thermostat.
Step 3: Label the wires
Before removing the wires from the thermostat, it is important to label them. This will make the installation of your new thermostat much easier. Use a piece of tape or a label maker to identify each wire’s corresponding terminal, such as RC, RH, Y, G, and W.
Step 4: Remove the wires
Using a screwdriver, carefully loosen the screws that hold each wire in place and remove them. Make sure to hold the wires in place as you remove them, so they don’t slip back into the wall.
Step 5: Remove the mounting plate
Once you have removed the wires, you can remove the mounting plate from the wall. There may be screws holding it in place, which you can remove with a screwdriver.
Step 6: Patch up the wall
Finally, you need to patch up the wall where the old thermostat was located. Use spackle or putty to fill in any holes left behind from the mounting plate. Sand the area until it’s smooth, and then paint over it to match your wall.
By following these six steps, you can remove your old thermostat easily and safely, getting your home ready for the installation of your new thermostat.
3. How to Choose the Right Replacement Thermostat for Your Home
Choosing the right replacement thermostat for your home can seem daunting with so many options available on the market. However, with a little bit of research and understanding, you can make an informed decision. In this section, we will discuss the factors you should consider when choosing a new thermostat.
Compatibility
The first factor to consider is compatibility. Not all thermostats will work with your HVAC system. That’s why it’s important to check the compatibility of your system with the thermostat you are considering. You can do this by checking the user manual or contacting a professional heating and cooling technician to help you.
Type of Thermostat
The next factor to consider is the type of thermostat that suits your needs. There are several kinds of thermostats available, including programmable, non-programmable, digital, and smart. Programmable thermostats allow you to set temperatures for specific times of the day, while non-programmable thermostats do not have this function. Digital thermostats are more precise than analog ones, and smart thermostats can be controlled remotely through a smartphone or tablet.
Features and Functions
Lastly, consider the features and functions you need from your thermostat. For example, if you live in a region with fluctuating weather, you may want a thermostat with adaptive intelligence that adjusts the temperature based on humidity, temperature trends, and outdoor weather. Other features to consider include zone control, touch screens, and energy-saving functions.
By considering compatibility, type of thermostat, and features and functions, you can choose the right replacement thermostat for your home. Remember to consult with a professional to ensure the thermostat you choose is compatible with your HVAC system.
4. Wiring Your New Thermostat: Tips and Common Mistakes to Avoid
Wiring a new thermostat can seem daunting, but it doesn’t have to be. With a little knowledge about the wiring process and some careful attention to detail, you’ll be able to install your new thermostat with ease. Here are some tips to make the process go smoothly:
Make sure you turn off the power
Before you start any electrical work, it’s important to turn off the power to your HVAC system. This will prevent any electrical shocks or damage to your system. You can usually turn off the power by either flipping a switch or disconnecting a fuse. Be sure to double check that the power is off before you start working.
Label your wires
Before you remove the old thermostat, be sure to label the wires so you know where they should be connected on the new thermostat. This will prevent any confusion or mistakes when it comes to wiring your new thermostat.
Don’t force the wires
When connecting the wires to your new thermostat, it’s important not to force them into place. This can damage the wires or the thermostat. Instead, gently push the wires into place and make sure they are securely connected.
Check your connections
Once you’ve connected all the wires, it’s important to double check your work. Make sure each wire is connected to the correct terminal on the thermostat. If you’re unsure, consult the wiring diagram that came with your new thermostat or contact a professional HVAC technician.
By following these tips and avoiding common wiring mistakes, you’ll be able to wire your new thermostat without any issues. If you’re still unsure about the wiring process, consider hiring a professional HVAC technician to help you out.
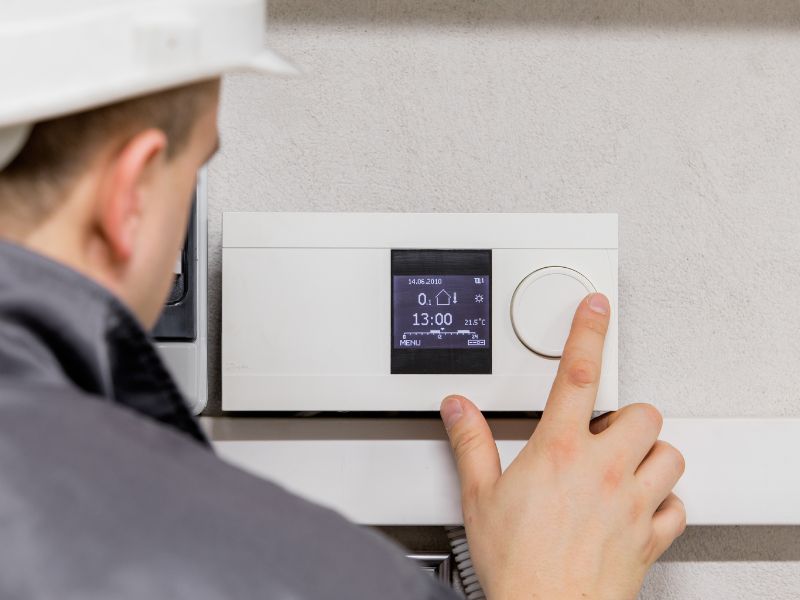
5. Programming Your New Thermostat: Setting Temperatures and Schedules
After installing your new thermostat successfully, it’s time to set the right temperatures and schedules according to your preferences and needs. Programming your thermostat allows you to control the temperature in your home more efficiently, save energy, and reduce your utility bills.
Setting the Temperatures: Begin by setting the temperature you desire during the day and night. According to the US Department of Energy, setting your thermostat 7-10 degrees Fahrenheit lower during winter nights or raising it during summer daylight hours can save about 10% yearly on heating and cooling costs. Also, consider the temperature preferences of your family members and adjust accordingly.
Scheduling Your Thermostat: Setting up a schedule in your thermostat ensures that your heating and cooling system operates according to your daily routine. For instance, if you are working during the day, it’s best to lower the temperature or turn off the heating altogether to save energy while you are away. Also, you can set your thermostat to end the cooling or heating cycle an hour before you leave or arrive home.
Programming Tips: When programming your thermostat, keep in mind that the temperature change takes time, so make sure to begin the change at least 30 minutes before your desired time. Additionally, avoid sudden changes in temperature, as it will consume more energy and put a strain on your HVAC system. Consider setbacks for long periods, such as a vacation, where you can set your thermostat at a lower temperature to save energy.
In summary, programming your thermostat plays a vital role in efficient temperature control, saving energy, and reducing utility bills. Take the time to set the temperatures and schedules according to your daily routine and preferences, and enjoy a comfortable home without breaking the bank.
6. Troubleshooting Your New Thermostat: Common Issues and How to Fix Them
After installing a new thermostat in your home, you may encounter some common issues that need to be fixed. Here are some of them and how to fix them:
Thermostat Not Turning On
If your new thermostat is not turning on, check the following:
– Check if the power source is on and the thermostat is properly connected to the power source.
– Check if the batteries are inserted correctly and have enough power.
– Check if the circuit breaker is on and if there’s power to the HVAC system.
If none of these solve the issue, you may need to call a professional.
Thermostat Not Displaying Correct Temperature
If your thermostat is not displaying the correct temperature, check the following:
– Check if the thermostat is properly placed away from direct sunlight, drafts or heat sources.
– Check if the thermostat is clean and not obstructed by any object.
– Check if the thermostat is properly calibrated. You can do this by comparing your thermostat’s reading to an accurate thermometer placed next to it.
If these do not work, you may need to recalibrate your thermostat or replace the sensor.
Thermostat Not Responding to Commands
If your thermostat is not responding to commands, check the following:
– Check if the thermostat is properly connected to the HVAC system and is set to the right mode.
– Check if the wiring connections are properly installed.
– Check if the thermostat is compatible with your HVAC system.
If these do not work, you may need to reset or replace your thermostat.
By following these troubleshooting tips, you can fix common issues that arise when setting up a new thermostat in your home. If you need further assistance, it’s always best to consult a professional.
People Also Ask
1. How do you shut off power to a thermostat?
Before working on a home thermostat, you must turn off the power supply to the unit. To do so, locate the circuit breaker or fuse that powers the thermostat and switch it off. Alternatively, switch off the power supply at the furnace or air conditioning unit.
2. How do you remove a thermostat from the wall?
To remove a thermostat from a wall, start by turning off the power supply. Then, gently remove the cover plate and label the wires according to their color and location. Unscrew the thermostat from the wall, and carefully disconnect the wires.
3. How do you install a new thermostat?
Begin by selecting a replacement thermostat that is compatible with your heating and cooling system. Turn off the power supply, and remove the old thermostat from the wall. Attach the wires to the corresponding terminals on the new thermostat, and screw it onto the wall. Finally, install the cover plate and turn the power back on.
4. How do I program my new thermostat?
Most new thermostats come with instructions on how to program them. Follow the steps provided by the manufacturer to set the time and date, as well as the desired temperature range for each time of day. Some models may also allow you to program the thermostat remotely using a smartphone app.
5. What should I do if my thermostat isn’t working?
If your thermostat isn’t working, check to make sure it is on and properly programmed. Make sure the power supply is turned on and that the wiring is connected properly. If the problem persists, consider replacing the thermostat or calling a professional to diagnose the issue.
Conclusion
Changing a home thermostat requires some basic knowledge of electrical wiring and home HVAC systems. By turning off the power supply, removing the old thermostat, and installing a new one, you can quickly and easily upgrade your home’s thermostat. Be sure to follow manufacturer instructions carefully, and consult a professional if you encounter any issues.

Ductwork Specialist
Nathan’s meticulous duct cleaning services eliminate dust and debris, improving air quality and system efficiency. His attention to detail guarantees a thorough and effective cleaning process.