
In the sweltering heat of summer, there’s nothing more frustrating than an AC compressor that fails to do its job. Dealing with a faulty AC compressor may seem daunting for those with limited mechanical knowledge, but fear not! This article will help you understand the common issues that plague AC compressors, how to diagnose them, and the step-by-step process to fix them. So grab your wrenches and let’s get started!
Tabe of Contents
- 1. Understanding the Function of an AC Compressor
- 2. Signs That Your AC Compressor Needs Repair
- 3. Essential Tools and Materials Needed for AC Compressor Repair
- 4. Step-by-Step Guide to Fixing Common AC Compressor Issues
- 5. Tips to Ensure the AC Compressor Runs Smoothly After Repair
- 6. When to Consider AC Compressor Replacement
- 7. Hiring a Professional AC Technician vs. DIY Repair for AC Compressor Issues
- People Also Ask
- Conclusion
1. Understanding the Function of an AC Compressor
The AC compressor is a vital component of your HVAC system that plays a significant role in keeping your home cool during hot weather. It is responsible for maintaining the proper pressure levels of refrigerant gas in the AC system, which is crucial for the cooling process.
The compressor is a mechanical pump that is powered by an electric motor and operates by drawing refrigerant gas from the evaporator coil, compressing it, and then pumping it into the condenser coil. This process causes the refrigerant to release heat and cools the air entering the evaporator coil.
The compressor operates under high pressure, which puts stress on its internal components over time. Therefore, preventive maintenance is crucial to help ensure the longevity and proper functioning of the AC compressor. Regular maintenance includes cleaning and checking the compressor’s oil and refrigerant levels.
Understanding the role of the AC compressor and how it works can help you identify issues and avoid costly repairs down the line. In the next section, we’ll discuss the signs that your AC compressor is in need of repair.
2. Signs That Your AC Compressor Needs Repair
If you’re experiencing problems with your air conditioning system, it’s important to identify whether the issue is caused by the AC compressor. The AC compressor is responsible for pumping refrigerant through the system, which cools the air in the room. Here are some signs that your AC compressor may need repair:
- Warm Air: If you notice that the air coming from your AC unit is no longer cool, it could indicate a problem with the compressor. The compressor may be unable to compress the refrigerant, resulting in warm air.
- Loud Noises: Strange noises coming from your air conditioning system can also point to a compressor problem. If you hear grinding or screeching sounds coming from the unit, it could be caused by a failing compressor.
- Faulty Electrical System: If you experience electrical issues or problems with your AC unit turning on, this could indicate a problem with the compressor. The compressor relies on an electrical system to function properly, and a faulty electrical system can cause issues with the compressor.
Other Signs to Watch Out For
In some cases, a failing compressor may also cause the air conditioning system to freeze up or leak refrigerant. If you notice any of these signs, it is important to have your AC unit inspected by a professional HVAC technician to determine if the issue is caused by the compressor.
Ignoring compressor issues can lead to more significant problems in your air conditioning unit, which may require costly repairs or replacement. By identifying these signs and addressing them promptly, you can save yourself time and money while keeping your home cool and comfortable.
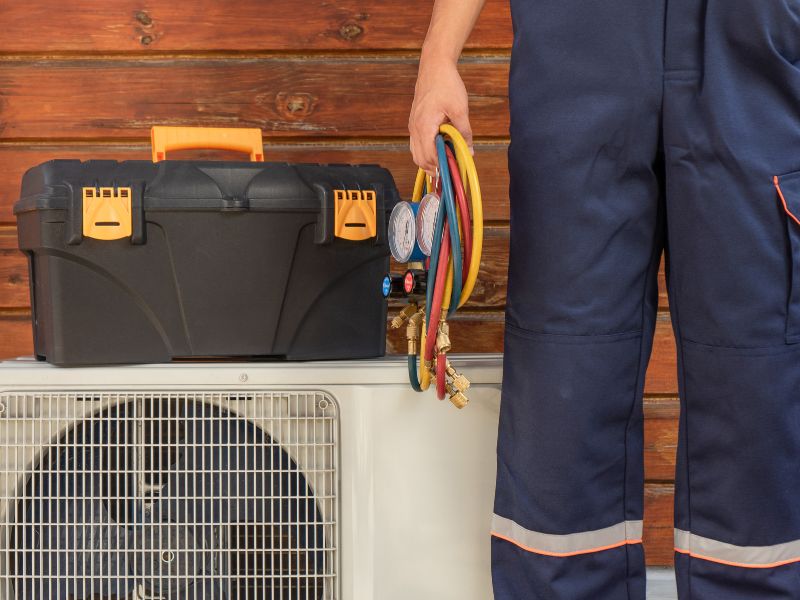
3. Essential Tools and Materials Needed for AC Compressor Repair
If you’re planning to fix your AC compressor by yourself, you need to have the right tools and materials. Here are the essential tools and materials for AC compressor repair:
Tools
- Wrench and Screwdrivers: These are the most basic tools you need to open your AC’s outer casing and compressor.
- Multimeter: This tool helps you measure the voltage and current flowing through different parts of your AC system, including the compressor.
- Torque Wrench: This tool is necessary to tighten the bolts and nuts of your compressor to the right torque level.
- Vacuum Pump: Using a vacuum pump is crucial when it comes to removing moisture and air from your AC before refilling it with refrigerant.
Materials
- Refrigerant: AC compressors need refrigerant to operate. Ensure to use the right refrigerant specified by the AC’s manufacturer.
- Compressor Oil: Adding the incorrect oil to your compressor can damage it. Find out the manufacturer’s recommended compressor oil type before adding it.
- Replacement Parts: If your compressor system has faulty parts, you need to replace them with new ones. These could include capacitors, contactors, and fan motors.
Having these tools and materials in place can save you time and money during the AC compressor repair process. You don’t want to be halfway through the repair process and realize that you don’t have the required tools or materials. With the right tools in hand, you can confidently start the repair, diagnose and fix the various issues that your AC compressor may have.
4. Step-by-Step Guide to Fixing Common AC Compressor Issues
In this section, we will provide a step-by-step guide on how to fix common AC compressor issues. It is important to note that before attempting any repairs, the system should be turned off and unplugged to avoid any electrical shock.
Step 1: Identify the Problem
The first step in fixing a malfunctioning AC compressor is to identify the problem. Some common issues include a compressor that won’t start, a compressor that won’t stop running, and a compressor that is making strange noises. Once the issue is identified, the appropriate repair can be made.
Step 2: Gather the Tools and Materials
The tools and materials needed for AC compressor repair vary depending on the problem. However, some essential items include a multimeter, a volt-ohm meter, a refrigerant recovery machine, refrigerant, and replacement parts.
Step 3: Disassemble the AC Compressor
Before attempting any repairs, the AC compressor must be disassembled. This includes removing the electrical plug, the compressor cover, and the compressor itself. During this process, it is important to keep track of all screws and parts to ensure they are put back correctly.
Step 4: Repair or Replace the Faulty Component
The next step is to repair or replace the faulty component. This can be tricky as it often involves working with electrical wiring, refrigerant, and other sensitive components. It is important to follow manufacturer guidelines and seek professional assistance if necessary.
Step 5: Reassemble the AC Compressor
Once the repair is complete, it is time to reassemble the AC compressor. This includes putting the compressor back into its housing, replacing the cover, and plugging in the electrical connections. Before turning the system back on, it is important to check for any leaks or loose connections.
In conclusion, fixing common AC compressor issues involves identifying the problem, gathering the appropriate tools and materials, disassembling the compressor, repairing or replacing the faulty component, and reassembling the system. If the repair seems too complex, do not hesitate to seek professional assistance. Following these steps can ensure a successful fix and optimal AC performance.
5. Tips to Ensure the AC Compressor Runs Smoothly After Repair
After repairing your AC compressor, it’s important to ensure that it runs smoothly and efficiently. Here are some tips to help you achieve that:
1. Proper maintenance
Regular maintenance is key to ensuring that your AC compressor runs smoothly after repair. Some of the maintenance practices you should perform include regular cleaning of the condenser coil, checking and changing air filters, and regular inspection of the compressor’s components. These practices will ensure that your AC compressor runs for a long time without any issues.
2. Regular Inspection
Periodically inspecting your AC compressor is an essential practice that will help you to detect any issues early on before they become severe. It’s recommended that you hire a professional HVAC technician to inspect your AC compressor at least once a year to ensure optimal performance.
3. Proper Use and Management
Proper use and management of your AC compressor will also go a long way in ensuring that it runs smoothly after repair. This includes avoiding overusing or overworking the AC compressor, ensuring that the thermostat is properly calibrated, and avoiding blocking the vents. Also, ensure that the compressor is installed by a certified technician and not in a location exposed to outdoor elements.
By properly maintaining, inspecting, and managing your AC compressor, you can ensure that it runs smoothly after repair, contributing to an efficient and comfortable home or workplace.
6. When to Consider AC Compressor Replacement
While AC compressor repair is often the most cost-effective solution for a broken unit, there are times when replacement is necessary. Here are some situations when you should consider getting a new AC compressor:
- Age of the Unit
- If your AC compressor is more than 10 years old and has frequent breakdowns or high maintenance costs, it may be time to replace.
- Extensive Damage
- If the compressor has suffered extensive damage such as a cracked casing or broken valves, replacing it may be the more practical solution.
- Cost of Repairs
- If the cost of repairing the compressor is close to or higher than the cost of a new one, it may be more cost-effective to replace the unit.
- Compatibility Issues
- If your compressor is no longer compatible with your AC unit or the refrigerant type, replacing it may be the best course of action.
Replacing an AC compressor is a major decision that requires careful consideration. Be sure to consult with a professional HVAC technician to determine the best solution for your specific needs and budget.
7. Hiring a Professional AC Technician vs. DIY Repair for AC Compressor Issues
When it comes to fixing AC compressor issues, homeowners often face a dilemma – whether to hire a professional technician or DIY. While DIY repair saves money, hiring a professional might be a better option if you lack the necessary knowledge and experience. Here are some factors to consider before making a final decision.
1. Complexity of the Issue
The complexity of the problem should be your primary consideration. If the issue is minor, such as replacing a fuse or cleaning the filter, DIY repair may be the best option. However, if the problem is more complex, such as replacing a compressor or repairing a refrigerant leak, hiring a professional is the best way to go. Attempting to fix such problems without the necessary skills and expertise can lead to further damage and even injury.
2. Availability of Tools and Equipment
Fixing an AC compressor requires specialized tools and equipment. If you have the required tools and equipment, DIY repair might be a viable option. However, if you don’t have access to the necessary tools and equipment, it’s best to hire a professional technician. Professionals have all the necessary tools and equipment to fix the problem efficiently and effectively. Also, attempting to fix issues without the proper tools and equipment can cause further damage.
3. Time and Convenience
DIY repair takes time and effort, and it might disrupt your day-to-day activities. If you’re busy, hiring a professional will save you time and effort, allowing you to focus on other things. Additionally, professionals have a flexible schedule and can work according to your convenience. Furthermore, technicians can quickly diagnose and fix the problem, saving you from any inconvenience caused by a faulty AC compressor.
Overall, deciding whether to DIY or hire a professional for AC compressor repair comes down to personal preference, time, complexity, and availability of tools and equipment. However, if you’re inexperienced or lack the necessary tools, hiring a professional is the best option. A professional technician will save you time, effort, and money in the long run, and ensure your AC compressor is running smoothly.
People Also Ask
What are common AC compressor problems?
Common AC compressor problems include blown fuses, low refrigerant levels, problems with the clutch, and leakage of refrigerant oil.
What are the signs of a bad AC compressor?
Signs of a bad AC compressor may include warm air blowing from vents, strange noises, leaks, and vibrations. These symptoms may also be indicative of other issues, so it is best to consult a professional for an accurate diagnosis.
Can you replace just the AC compressor?
It is possible to just replace the AC compressor, but it is important to also address any underlying issues that may have caused it to fail in the first place. This can include inspecting the entire AC system for leaks, replacing damaged hoses, and ensuring proper refrigerant levels.
How much does it cost to fix an AC compressor?
The cost to fix an AC compressor can vary widely depending on the make and model of the vehicle, as well as the severity of the issue. Repairs can range from a few hundred dollars to over a thousand dollars.
Is it better to replace the AC compressor or the entire AC unit?
In some cases, it may be more economical to replace the entire AC unit rather than just the compressor, especially if the unit is older and has multiple issues. However, this decision should be made on a case-by-case basis.
Conclusion
Fixing an AC compressor can be a complex and costly process, but proper maintenance and early detection of issues can help prevent major problems from occurring. If you suspect that your AC system is not working correctly, it is best to consult a professional for an accurate diagnosis and repair. With the right care and attention, your AC compressor can last for many years and help you stay cool and comfortable during the hottest months of the year.

AC Maintenance Supervisor
Ethan’s dedication to routine maintenance and duct cleaning ensures your AC systems remain in top-notch condition. His meticulous approach guarantees efficiency and longevity for your cooling units.