
Do you often feel like your home’s AC system is not working effectively, no matter how much you crank up the thermostat? Are you paying unusually high energy bills, but still find your home uncomfortably warm? If yes, then the culprit is most likely a leak in your cooling system. A small refrigerant leak not only hampers your AC’s performance but also causes significant damage to the environment. While it’s always wise to call in a professional AC repair specialist, you can take a few DIY steps to diagnose and locate a refrigerant leak in your AC system. Keep reading to learn how to spot and fix AC leaks and restore your cooling system’s efficiency and functionality.
Tabe of Contents
- 1. Introduction: Understanding AC leaks and their impact on your home cooling system
- 2. Signs of AC Leak: How to diagnose AC leak in the home AC unit
- 3. Tools Needed: Essential tools required to detect AC leaks in the AC system
- 4. Locating the Leak: Step-by-step guide on how to locate an AC leak in your home AC system
- 5. Fixing the Leak: Tips on how to fix the AC leak in your home cooling system
- 6. Preventing AC Leaks: How to prevent future AC leaks in your home AC system
- 7. Conclusion: Recap and summary of key takeaways on how to find and fix AC leaks in your home AC system
- People Also Ask
- Conclusion
1. Introduction: Understanding AC leaks and their impact on your home cooling system
Understanding AC leaks and their impact on your home cooling system is an essential aspect of maintaining your HVAC system’s efficiency. It’s important to recognize the signs of AC leaks and the tools needed to detect them, as this can save you money on higher electricity bills and expensive repairs.
AC leaks are when refrigerant, the substance responsible for cool air production in your AC system, escapes from the system’s pipes, coils, or other components. This can lead to an increased workload on your AC unit, resulting in inadequate cooling, higher energy bills, and ultimately, damages to the system.
If you notice that your AC system isn’t cooling as it should or that there is ice buildup on the refrigerant line, it’s a clear sign that your unit has an AC leak. Other symptoms to watch out for include hissing noises, a reduction in air ventilation, and unpleasant odors emanating from the AC unit.
In the following article sections, we’ll discuss how to diagnose an AC leak, the essential tools required to detect them, a step-by-step guide on how to locate them, and how to prevent future AC leaks from happening.
2. Signs of AC Leak: How to diagnose AC leak in the home AC unit
AC leaks are a common problem that can affect the efficiency and functionality of your home AC system. Detecting the signs of an AC leak is crucial to ensure that your AC unit is running at its expected capacity and to prevent further damage to the system.
Visual Signs
One sign of an AC leak is visible refrigerant on or around the AC unit. Refrigerant is the substance that is responsible for cooling your home, and when it leaks, it can cause the AC system to fail. If you notice that there is a puddle of liquid around the AC unit, it could indicate that there is a refrigerant leak. Also, if the refrigerant has leaked and there is not enough of it in the system, the evaporator coil can freeze and cause damage to other components, such as the compressor.
System Performance
Another way to diagnose AC leaks is by figuring out if the system is performing as it should be. If you notice that your AC unit is not producing cool air, doesn’t cool the room as quickly as it used to, or the airflow is not as strong as usual, it could indicate an AC leak. Low refrigerant levels can cause your AC unit to start blowing warm air, which can indicate that there is a problem that needs to be addressed.
Other symptoms of AC leaks include higher utility bills due to reduced efficiency, strange noises coming from the AC system, and poor air quality caused by inadequate air filtration. If you observe any of these signs, it’s always best to contact a professional HVAC technician to diagnose the cause of the problem and find the best solution.
3. Tools Needed: Essential tools required to detect AC leaks in the AC system
In order to detect an AC leak in your home cooling system, there are several essential tools that you will need to have on hand. These tools can assist in identifying the location of the leak and provide an indication of the severity of the problem. Here are the tools that you will need:
1. UV Dye: This tool is used to identify leaks by injecting it into the AC system. The dye will flow through the AC system and collect at the location of the leak. Once a UV light is shone on the system, the dye will become visible, indicating the exact location of the leak.
2. Leak Detector: This device is specifically designed to detect gas leaks in HVAC systems. It works by sensing the refrigerant gas and sounding an alarm when it detects a leak.
3. Pressure Gauges: These gauges are used to measure the pressure of the AC system before and after the refrigerant has been added. They can help to identify issues within the system, such as a blockage or low refrigerant levels, which could be causing the leak.
4. Refrigerant Detector: This tool can detect the exact location of a refrigerant leak using a probe that senses the gas. Once the leak is located, the detector will sound an alarm, allowing you to pinpoint the location of the leak more easily.
By having these essential tools on hand, you can detect the location of the leak in your home AC system more quickly and efficiently. Once you have identified the location of the leak, you can begin to fix it and restore your system to its optimal efficiency.
4. Locating the Leak: Step-by-step guide on how to locate an AC leak in your home AC system
Locating an AC leak in your home AC system can be a daunting and frustrating task. However, with the right tools and approach, the process can be made easier. Here is a step-by-step guide on how to locate the leak in your home AC system.
Step 1: Turn off the Power
Before starting any inspection, it is essential to turn off the power to the unit. Locate the circuit breaker in your main electrical panel and turn it off. This will prevent the risk of electrical shock and protect you from any further damages.
Step 2: Inspect the Refrigerant Lines
Inspect the refrigerant lines for any signs of wear and tear or damage such as cracks, dents, or corrosion. Use a flashlight to locate any visible leaks along the refrigerant lines, and check for any oil stains or residue near the leak. This could be an indication of a leak.
Step 3: Leaking Connections
Check the connections between the refrigerant lines and the unit to see if there are any signs of leakage. Use a leak detection tool to spray around the connections and observe if there is any bubbling. If bubbling is detected, it would indicate that a leak is present in this area.
Step 4: Check the Evaporator Coil
The evaporator coil is responsible for absorbing the heat in the air. Inspect the coil for any ice or frost buildup, which could be a sign that there is a leak. If there is a leak, the coil will not cool as well as it should, resulting in ice or frost buildup.
Finding an AC leak in your home AC system can be a tedious task, but it is essential to identify leaks early to avoid further damage to your cooling system. If you are unsure, or if you are experiencing any difficulties in locating the leak, it is best to consult a professional HVAC technician for assistance.
5. Fixing the Leak: Tips on how to fix the AC leak in your home cooling system
In this section, we will discuss tips on how to fix the AC leak in your home cooling system. It’s important to note that fixing an AC leak requires some technical expertise and you should always consider hiring a professional to do the job. However, if you have some experience with HVAC systems, and you’re confident that you can do it yourself, then these tips will come in handy.
Tip 1: Identify the source of the leak
Before fixing the leak, it’s essential to identify the source of the problem. Once you’ve located the leak, turn off the power supply to the unit to avoid any accidents, and clean the area around the leak to get a clearer view. In most cases, leaks are caused by a damaged or worn-out component such as the evaporator coil, refrigerant lines, or the condenser coil.
Tip 2: Replace damaged components
Once you’ve identified the component responsible for the leak, the next step is to replace it. For instance, if the evaporator coil is the problem, you’ll need to replace it with a new one. If you’re considering replacing certain parts of the AC system, it’s always a good idea to consult with an HVAC professional to ensure that you’re using the right parts for your system.
Tip 3: Recharge the refrigerant
After you’ve replaced the damaged component, the next step is to recharge the refrigerant. This process should only be done by a licensed HVAC technician. They’ll charge the system with the appropriate amount of refrigerant required for your AC system.
Overall, fixing an AC leak can be a time-consuming and complicated task, and it’s crucial to approach it with caution. Remember, safety always comes first, and if you’re not confident in your abilities, it’s best to contact a professional to fix the problem.
6. Preventing AC Leaks: How to prevent future AC leaks in your home AC system
If you want your home AC system to run efficiently and avoid costly repairs, preventing AC leaks is key. Here are some tips to help you prevent AC leaks in your home AC system:
Regular maintenance
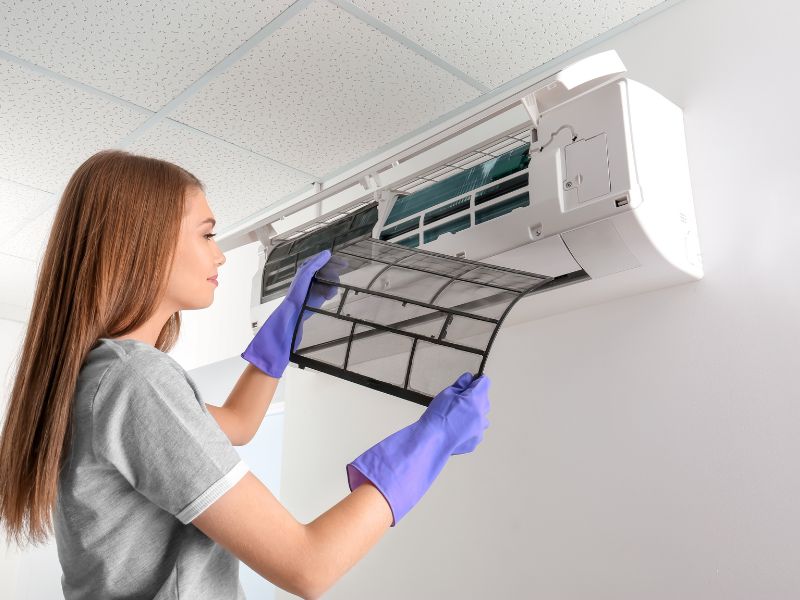
One of the simplest and most important ways to prevent AC leaks is to perform regular maintenance on your home AC system. This includes cleaning or replacing air filters regularly, inspecting the system for signs of wear and tear, and scheduling annual AC maintenance by a trained HVAC technician. Regular maintenance can help to identify potential issues early on, before they become major problems that lead to AC leaks.
Avoid DIY repairs
When your AC system needs repairs, it’s important to rely on a trained HVAC technician. Trying to fix the issue yourself can lead to further damage, including AC leaks. Professional technicians have the tools, knowledge, and experience to safely and effectively diagnose and repair AC issues.
Avoid overworking your AC system
Overworking your AC system can lead to a range of problems, including AC leaks. To avoid this, make sure your home stays well-ventilated and that the thermostat is set to a temperature that doesn’t require the AC to work too hard. Insulating your home can also help to reduce the workload on your home AC system, preventing AC leaks.
Preventing AC leaks in your home AC system is all about staying on top of maintenance and ensuring that your AC system is running smoothly. By following these tips, you can prevent AC leaks and extend the life of your home cooling system.
7. Conclusion: Recap and summary of key takeaways on how to find and fix AC leaks in your home AC system
In conclusion, finding and fixing AC leaks in your home AC system is an essential maintenance task that requires the right tools, knowledge, and skills. Properly diagnosing and locating the leak is crucial for quick and effective repairs. Some key takeaways to keep in mind include:
Regularly check your AC system for signs of leaks:
Monitor your AC system for reduced cooling performance, ice formation, or hissing sounds that may indicate a leak. Catching the issue early can prevent further damage and costly repairs.
Essential tools for finding and fixing leaks:
Ensure you have a quality refrigerant leak detector, UV dye, and a UV light to help spot leaks. Additionally, you may need a set of wrenches or pliers for tightening connections and pipes.
Step-by-step guide for locating leaks:
Start with checking the refrigerant pressure, then inject UV dye into the system and use a UV light to find the leak. Check common leak areas like the evaporator coil, condenser coil, or Schrader valves. Fix the leak with a soldering gun, brazing, or pipe sealant, and recharge the refrigerant.
Preventing future leaks:
Regular maintenance, cleaning, and inspections can help prevent future leaks. Check and replace air filters, clean coils and fins, and lubricate motors and bearings. Additionally, ensure all connections and fittings are tight, and avoid overcharging or undercharging the refrigerant.
By following these tips, you can keep your home AC system in top condition and avoid costly repairs caused by AC leaks. Regular inspections and preventive measures can go a long way in keeping your home cool and comfortable.
People Also Ask
How do I know if my AC is leaking?
If you notice warm air blowing from the vents, an unusual increase in your electricity bills, ice forming on the evaporator coils, or a hissing noise coming from your AC unit, there could be a refrigerant leak.
What causes an AC system to leak?
Leaks occur in an AC system because of wear and tears caused by vibration, corrosion, or environmental damage. Some common causes of AC leaks include loose tubing, holes and cracks in the evaporator coil, or malfunctioning valves.
Can I fix an AC refrigerant leak myself?
It is not recommended to fix an AC refrigerant leak yourself unless you have sufficient knowledge and experience in repairing AC systems. AC systems require specialized equipment and expertise to repair leaks, and DIY repairs can cause more damage than good.
How much does it cost to fix an AC refrigerant leak?
The cost of fixing an AC refrigerant leak varies depending on the severity of the leak, the location of the leak, and the type of refrigerant used. In general, fixing a minor leak could cost around $150 to $300, while fixing a severe leak could cost around $1,000 or more.
What happens if you don’t fix an AC refrigerant leak?
If you don’t fix an AC refrigerant leak, it can cause your system to work harder and longer to cool your home, resulting in higher electricity bills. Over time, running your AC system with low refrigerant levels can cause expensive damage to the compressor and other components, leading to costly repairs or even a complete AC system replacement.
Conclusion
If you suspect that your AC system has a refrigerant leak, it is important to contact a professional technician as soon as possible. Refrigerant leaks can cause significant damage if not promptly repaired, leading to costly repairs or replacing your entire AC system. Remember to have your AC system regularly inspected by a professional to prevent leaks from occurring in the first place.

Senior AC Consultant
Jackson’s wealth of knowledge in air conditioning units assists clients in selecting the most suitable systems. His guidance ensures optimal cooling solutions tailored to specific needs.